Showing posts with label DIY. Show all posts

Monday, April 5, 2010

The obligatory Easter egg post.


I saw a blog with a Rubber Cement trick for dying eggs - I can't find it now to link for credit, but if you know the blog I am talking about (bold colors and rubber cement is really all I remember) please share the link!

Anyway, once I saw it I knew I had to do it. As I mentioned in yesterday's post I went to my dads house and while he was gone picking up my sister I recruited his gf to dye eggs with me, of course we reluctently and impatiently saved some for my sister and dad. We canvased the small town for last minute supplies and got to work. Below is how it went... told with some not so perfect pictures.


Doesn't that look exciting?? I loved it. We all had a blast and tried different things: mixing colors, using the crayon, the rubber cement, we got a little silly and starting dying eggs to look like each other. The one my sister made of me sadly broke it's noggin' but you can see the one I made of my sister. She is 16 so I gave her egg the swoosh, peace sign, and awkward smirk. Nothing artistic, but we had tooooo many laughs :) Below are some of my favorites.


We started out with 2 dozen eggs but between my sister being hungry and the dog being hungry and a few cracked ones, our final stash looked a little small. Haha I hadn't dyed eggs in years, this was a ton of fun.

At least one more post coming this week about my Easter weekend. I hope everyone's Monday went well!
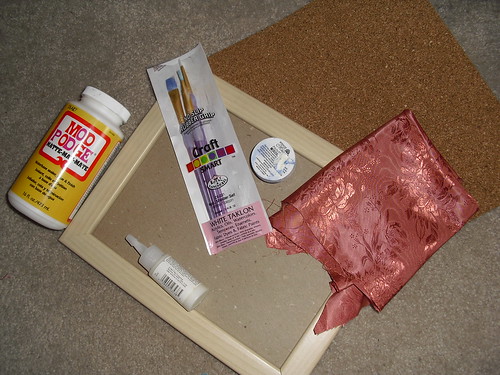
Saturday, March 27, 2010

DIY: Chalkboard

As per usual, I was browsing the thrift store and came across this vintage TV Tray. There is one identical to it at our family cottage so I immediately had a fondness for it. I had seen so many projects with chalkboard paint and I thought this would be a great candidate for a chalkboard project of my own.

I know the flowers are very pretty, but they had to go!


The snow was great to do the spray painting, the mess just melts away!


Tada! I love it. Since the tray was metal it is also magnetic; perfect for my fridge!

Linked at Someday Crafts

Thursday, March 25, 2010

DIY: Necklace Organizer

After I received jewelry as a gift from a co-worker I knew it was time to organize my necklaces, it was getting a little out of control! I spent more time trying to de-tangle them than actually wearing them! I decided to document the process of my craftiness. This idea I just kind of came across a few times, so no one to give credit to.

Materials:
8 x 10 frame. ($3 from a thrift store)
Mod Podge - I had in my stash from a previous project (You can find it at Michael's)
Scrap Fabric
Paint -White for me (I bought it for 69 cents at a thrift store)
Paint Brushes
Cork Board - Left over from College
Not Pictured:
Roller Sponge to apply Mod Podge
Colorful tacks -Making another appearance - left over from college
Instructions:
1. Paint the frame.
2. Cut cork board to fit in frame
3. Mod Podge the fabric to your Cork board
4. Pull excess fabric tight to the other side and Mod Podge
5. Cut off excess
6. Not pictured: Put the fabric covered Cork board under a big stack of books. I used Harry Potter books. Haha Nice and heavy!
7. Wait what seemed like an eternity for it to dry - At least a full 24 hours.
8. Put it all together
9. Put colorful -perfectly matching in my case :) - tacks in a uniformed position. 4 in the top row and 3 in the bottom row...not directly below, or your necklaces will tangle.
10. Hang on wall. I used a small nail and my picture frame already had a spot on it to hang up.
11. Put necklaces on and enjoy!

I am really happy with it and it matches my bathroom really well. I am now brain storming ideas on how to organize my earrings. I think I have it figured out, I will post an update blog when it happens. Thanks for reading and if you have any extra ideas or a jewelry organization tutorial too, feel free to post links in the comments!

Linked at Someday Crafts

Thursday, March 18, 2010

50% off to 100% hott!

So, I was shopping at the wonderful Mall of America and I came across these beautiful shoes. Let's not concentrate on the fact that I went to the mall to by one thing and one thing only and some how these ended up in my bags. Yes, I said bags with an s. I obviously cannot go to a mall and just buy one thing. I mean honestly, how could you pass them up if they are 50% off??

And here is the reason they were on sale. That hole, that hole that I can put my finger through and definitely ruin the whole look of the shoe. No worries though, I knew it was there. My crafty side of the brain got working and I knew I would figure something out.

Then today, Craft ENvy, a blog I follow, posted a shoe re-vamp blog. And I was inspired! Below is the final result!


I love them! Hopefully I can pull them off. I don't know if you guys know this but I am just short of 6 feet tall and these shoes have 4 inch heels. Haha I like to make a statement! :) I made last minute plans to visit family this weekend and Saturday I need to dress up, I hope I can find an outfit for these to work with. Have a great weekend!

Sunday, March 14, 2010

DIY: Flower Pillow

I found a tutorial for Felt Flower Pillows over at Craftzine and I had to give it a try, I did not use felt though. After an awesome trip to the thrift store yesterday I came back with arms full of fabric so I figured I would just give it a try with my new finds.


Above are the before and after. The pillows came with my couches that I bought from a thrift store when I first moved, I hated them. So, I covered them with these flower covers. They look WAY better, even if they don't match anything haha. Also, I barely spent anything to make them - thrifted fabric ( $5 - and I still have some left), thrifted thread ($.69 for 5 spools), and I already had the pillow forms.

Oh! And because all of this fabric is taking up space I don't have-dang studio apartment-I am looking for new tutorials or ideas of stuff to sew. Any recommendations?

Saturday, March 13, 2010

DIY: Kitchen Decor

How cute is that?? I have had some old coffee sacks taking up room on my craft shelves that needed to be used and I came up with this! I LOOOOVE coffee and what better place to show that than in the kitchen, the room that supplies me my coffee.

I found the plants at Ikea, kind of adds a southwestern feel.


These were so easy to make, except the burlap is so thick that I broke a few needles during the process. Just sew right sides together, leaving a 2 inch gap un-sewed, turn right side out and stitch all the way around. Piece of cake!

I was so sick of a blank kitchen wall. I found the wooden embroidery hoops at a thrift store and I had some round plastic tacks lying around. I just picked my favorite parts of the sack and placed the hoop and cut off the excess.


You can usually find coffee sacks for free at any shop because they just end up throwing them away. This whole project only cost me $7, and that's with the plants included!

Lastly, I replaced my broken camera, so new blogs on the way!

Linked at Someday Crafts